
Getting solid internet in an RV used to mean juggling campground Wi Fi, a phone hotspot, and a prayer. These days, satellite internet has made it realistic to work, stream, and stay connected even when you are far from cell towers. Still, RV Starlink installation is not just “buy it and stick it anywhere.” A little planning goes a long way, especially when you are dealing with power limits, roof sealing, trees, and gear that needs a clear view of the sky.
This guide walks you through the choices and the process in a calm, no drama way. You will learn how to pick the right mounting approach, protect your roof, route cables neatly, and set up a system you can trust for day to day travel.
What should you know before starting an RV Starlink installation?
A successful setup starts with understanding what Starlink needs to work well: open sky, stable power, and a mounting solution that matches how you travel. The biggest issues people run into are avoidable, like blocked signal from trees, messy cable runs, and mounts that do not match their driving style. Decide early whether you want a temporary setup or a permanent roof mount, then plan around that.
How does Starlink work differently in an RV?
Starlink uses a low earth orbit satellite network and a phased array dish that automatically aims itself. In practical terms, it wants:
- A wide, unobstructed view of the sky
- A stable power source, so your RV electrical setup matters here
- Secure placement so the dish does not move or vibrate excessively
If you stop in open areas a lot, Starlink can feel like a cheat code. If you camp under heavy tree cover, it can struggle, even if your phone gets a weak signal.
Which service plan and hardware setup makes sense?
Before you drill anything, confirm your plan and how you will use it:
- Mostly stationary camping: A more permanent mount can make life easier.
- Frequent travel with quick overnights: A portable or semi permanent solution may be better.
- Work calls and daily uptime needs: Prioritize stability, strain relief, and clean cable routing.
Hardware matters too. Different Starlink kits and generations can have different cables, routers, and mounting compatibility. The goal is the same either way: protect the cable, keep water out, and give the dish the best view possible.
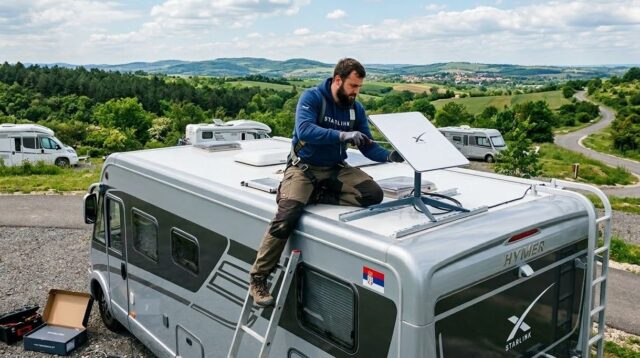
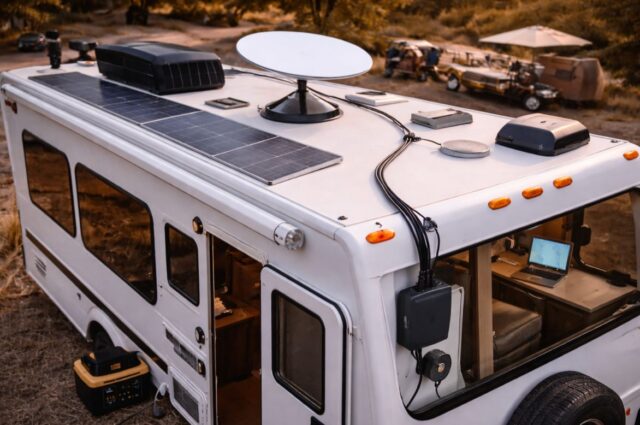
Where is the best place to mount Starlink on an RV?
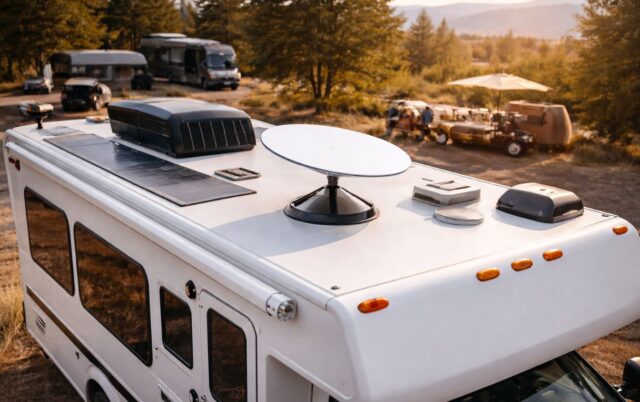
The “best” location depends on your RV roof layout and where you typically park. The ideal placement is high, stable, and away from obstructions like AC units, roof racks, vents, and anything tall that can block the dish’s line of sight.
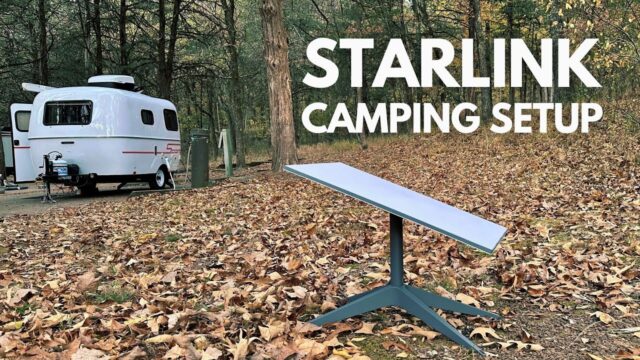
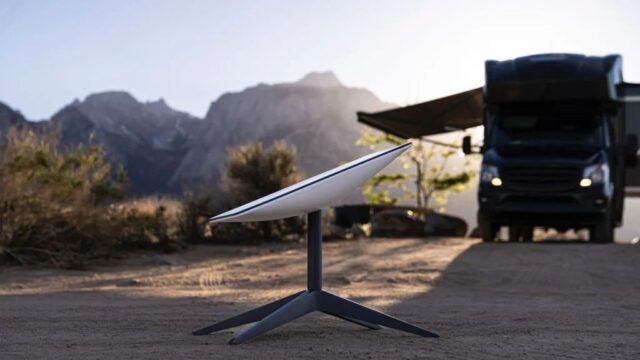
Should you mount on the roof or keep it portable?
A roof mount is usually best if you want a consistent, ready to go setup. You arrive, power on, and you are online. It also reduces the risk of someone tripping over cables or the dish walking away when you are away from camp.
A portable ground setup can be better if you often camp in partial tree cover. You can place the dish in a clearing and run a longer cable back to the RV. The tradeoff is setup time and more cable to manage.
A lot of RVers end up with a hybrid approach: a roof friendly mounting system that can still be removed if needed, or a ground tripod kept as a backup for wooded sites.
How do you avoid obstructions and signal drops?
Obstructions are the number one reason people feel disappointed after installing Starlink. A few practical tips:
- Look for open sky above the roofline, not just “open space” around the campsite.
- Avoid placing the dish behind tall roof equipment like air conditioners or storage pods.
- Remember that trees you barely notice can still block signal, especially if they are between you and the direction the dish wants to face.
If you are unsure, use Starlink’s obstruction checking feature in the app at several possible mounting points before committing.
What about ladder mounts, rear mounts, or rack mounts?
If roof drilling makes you nervous, there are alternatives:
- Ladder mounts can work well and are easier to service. They can also be less stable on rough roads if not designed properly.
- Rear mounts may be convenient but can create obstructions depending on your RV height and roof layout.
- Roof rack mounts are great if you already have a rack system and want a solid, modular install.
Pick a method that matches your comfort level with drilling and your typical travel conditions.
What tools and materials do you need for RV Starlink installation?
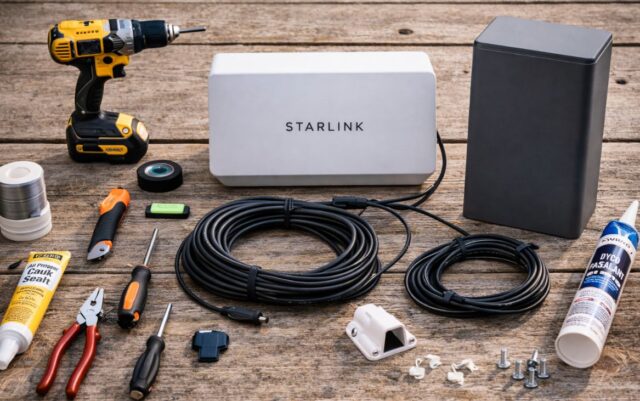
You do not need a full workshop, but you do need to be prepared. Running cables and sealing roof penetrations is not the time for “I will figure it out later.”
Basic tools you will likely use
- Drill and appropriate drill bits
- Screwdrivers and wrenches, depending on mount type
- Measuring tape and marker
- Zip ties or cable clamps
- A fish tape or wire pull tool, helpful for routing
- Rubbing alcohol and clean cloths for surface prep
If you are routing through a roof or wall, take the time to use the right bit, go slow, and protect any exposed material.
Weatherproofing and cable protection essentials
- RV grade sealant compatible with your roof material
- Grommets for any cable pass through holes
- UV resistant cable management, especially on the roof
- Strain relief so the cable is not tugging at connectors
- Optional conduit or protective sheathing for long exterior runs
A clean cable run is not just cosmetic. It prevents snags, wear, and water intrusion.
How do you install Starlink step by step on an RV?
There are many variations, but most installs follow the same basic flow: choose the location, mount the dish, route the cable, set up power, and test.
Step 1: Choose your mounting location and test for obstructions
Before you mount anything, stand on a stable ladder or use safe roof access and do a quick check:
- Identify the flattest, most open area
- Confirm you can route the cable without crossing problematic areas
- Test for obstructions using the app from the intended location
This is your measure twice moment.
Step 2: Install the mount securely
Follow the mount manufacturer instructions carefully. The key principles are:
- Distribute load so the mount stays stable in wind
- Use proper hardware for the roof material
- Do not overtighten into thin roof structures
- Avoid mounting where water pools
If you are drilling into the roof, sealant is not optional. Use a generous, neat bead and ensure fasteners are fully protected from moisture.
Step 3: Route the cable safely into the RV
Cable routing is where installs either feel professional or feel like a temporary hack.
Common routing options include:
- Through an existing cable entry point, best when possible
- Through a dedicated roof gland or pass through
- Along an exterior route to an existing utility access panel
Wherever the cable enters, use a grommet or gland and seal it properly. Inside, route the cable away from sharp edges, heat sources, and moving parts like slide mechanisms.
Step 4: Set up your router location and airflow
Your Starlink router should be:
- In a dry, ventilated area
- Away from direct heat sources
- Close enough to provide decent Wi Fi coverage
Some RVers place it near the entertainment center. Others put it in an overhead cabinet with ventilation. If Wi Fi coverage is spotty in the bedroom or outdoor area, you can add a mesh system or reposition the router for better signal.
Step 5: Connect power in a way that matches your RV setup
Power planning matters, especially if you boondock.
If you are on shore power most nights, this is simple. If you rely on batteries and an inverter, consider:
- Inverter capacity and continuous load
- How long you want to run Starlink off grid
- Whether you need a dedicated outlet or fused circuit
Avoid overloading shared circuits. A stable, clean power setup reduces random reboots and frustration.
Step 6: Run a real world test
Once everything is mounted and connected:
- Power up and let the dish acquire satellites
- Run a few speed tests at different times of day
- Walk around inside the RV to check Wi Fi coverage
- Check for cable strain and ensure the mount does not wobble
Do this before you pack away tools. It is much nicer to fix small issues while you are still in install mode.
How can you make Starlink work better while traveling and camping?
Even a perfect install can feel inconsistent if your camping style fights the limitations of satellite internet. The good news is you can improve reliability with a few habits.
How do you handle tree cover and partial obstructions?
If you camp in forests often, consider:
- Keeping a portable tripod option for wooded sites
- Carrying an extension cable if your setup supports it
- Parking with the dish side facing the clearest part of the sky
Sometimes the fix is as simple as moving the RV ten feet or turning the rig slightly to open up the dish view.
How do you reduce setup hassle for overnight stops?
If you move frequently, the best setup is the one you will actually use. Prioritize:
- A mount that stays aligned and does not require fiddling
- A cable route that does not need to be redone each stop
- A router location that does not require rearranging your RV interior
This is where a more permanent RV Starlink installation pays off. You will connect more often because it is easy.
Should you integrate Starlink with your existing RV internet setup?
If you already have a cellular router or booster, Starlink can complement it. Some RVers use:
- Cellular as the default when it is strong
- Starlink when cell coverage is weak
- A router setup that can switch between sources
This kind of setup can be great for remote work, but it does add complexity. If you want simple, keep Starlink standalone at first, then expand later if needed.
What are common mistakes to avoid during RV Starlink installation?
A few missteps show up again and again. Avoid these and you will save yourself a lot of cleanup.
Skipping obstruction checks
Mounting in a convenient spot without checking the sky view is the fastest way to get inconsistent service. Always check first, even if the roof looks open.
Poor sealing and rushed roof penetrations
Any hole in an RV is a long term relationship with maintenance. Use the right sealant, prep the surface, and check your work after heavy rain.
Cable runs with no strain relief
Cables fail when they are bent sharply, stretched, or rubbing against rough edges. Use gentle curves, clamps, and protective sleeves where needed.
Placing the router where it overheats or performs poorly
Tight, unventilated cabinets can trap heat. Also, metal structures and appliances can weaken Wi Fi. Give the router a bit of breathing room and test coverage before finalizing placement.
How do you maintain and troubleshoot your setup over time?
Once installed, Starlink is mostly hands off, but RV life is rough on gear. A quick monthly check can prevent surprises.
What routine checks are worth doing?
- Inspect roof cable routing for UV wear or loose clamps
- Confirm sealant is intact and not cracking
- Check connectors for moisture or corrosion
- Retest obstructions if you add roof gear later
What should you do if performance suddenly drops?
Start with the basics:
- Recheck for obstructions, trees change with seasons
- Power cycle the system
- Inspect the cable for pinches or abrasion
- Confirm the mount has not shifted or loosened
If you travel through different climates, condensation and temperature swings can also affect connections. Keeping cables protected and entry points sealed helps.
What does a good RV Starlink installation look like?
A solid install is stable in wind, tidy in cable management, sealed against water, and convenient enough that you actually use it regularly. It does not need to be complicated, but it should be intentional.
If you do one thing before you start, do this: decide whether you want portable flexibility or a ready to go permanent setup, then plan your mount and cable route around that decision. From there, the rest of the process becomes straightforward.
With the right approach, RV Starlink installation turns internet from a constant travel headache into something you can rely on, whether you are parked at a desert overlook, tucked beside a quiet lake, or rolling into a new spot after sunset.


